Computing workflow
Introduction
This webpage will introduce you to the course computing workflow. The main goal is to reinforce our demo of Python and VS Code, which we will be using throughout the course both to learn the data science concepts discussed in the course and to analyze real data and come to informed conclusions.
Python is the name of the programming language itself and VS Code is a convenient interface, commonly referred to as an integrated development environment or an IDE, for short.
An additional goal is to reinforce Git and GitHub, the version control, web hosting, and collaboration systems that we will be using throughout the course.
Git is a version control system (like “Track Changes” features from Microsoft Word but more powerful) and GitHub is the home for your Git-based projects on the internet (like DropBox but much better).
As the assignments progress, you are encouraged to explore beyond what the assignments dictate; a willingness to experiment will make you a much better programmer. Before we get to that stage, however, you need to build some basic fluency in Python. Today we begin with the fundamental building blocks of Python and VS Code: the interface, reading in data, and basic commands.
This page assumes that you have already completed Homework 0. If you have not, please go back and do that first before proceeding.
Getting started
Clone the repo & start new VS Code window
Go to the course GitHub classroom. Click on the desired repo. It contains the starter documents you need to complete the assignment.
Click on the green CODE button, select Use HTTPS (this might already be selected by default). Click on the clipboard icon to copy the repo URL.
In VS Code, go to File ➛ New Window ➛Clone Git Repository (under Start).
Copy and paste the URL of your assignment repo into the dialog box Provide repository URL or pick a repository source.
Click ds.py to open the template Python script. This is where you will write up your code for the assignment.
Also see similar steps within the Setting up Python page on the course website.
Python and VS Code
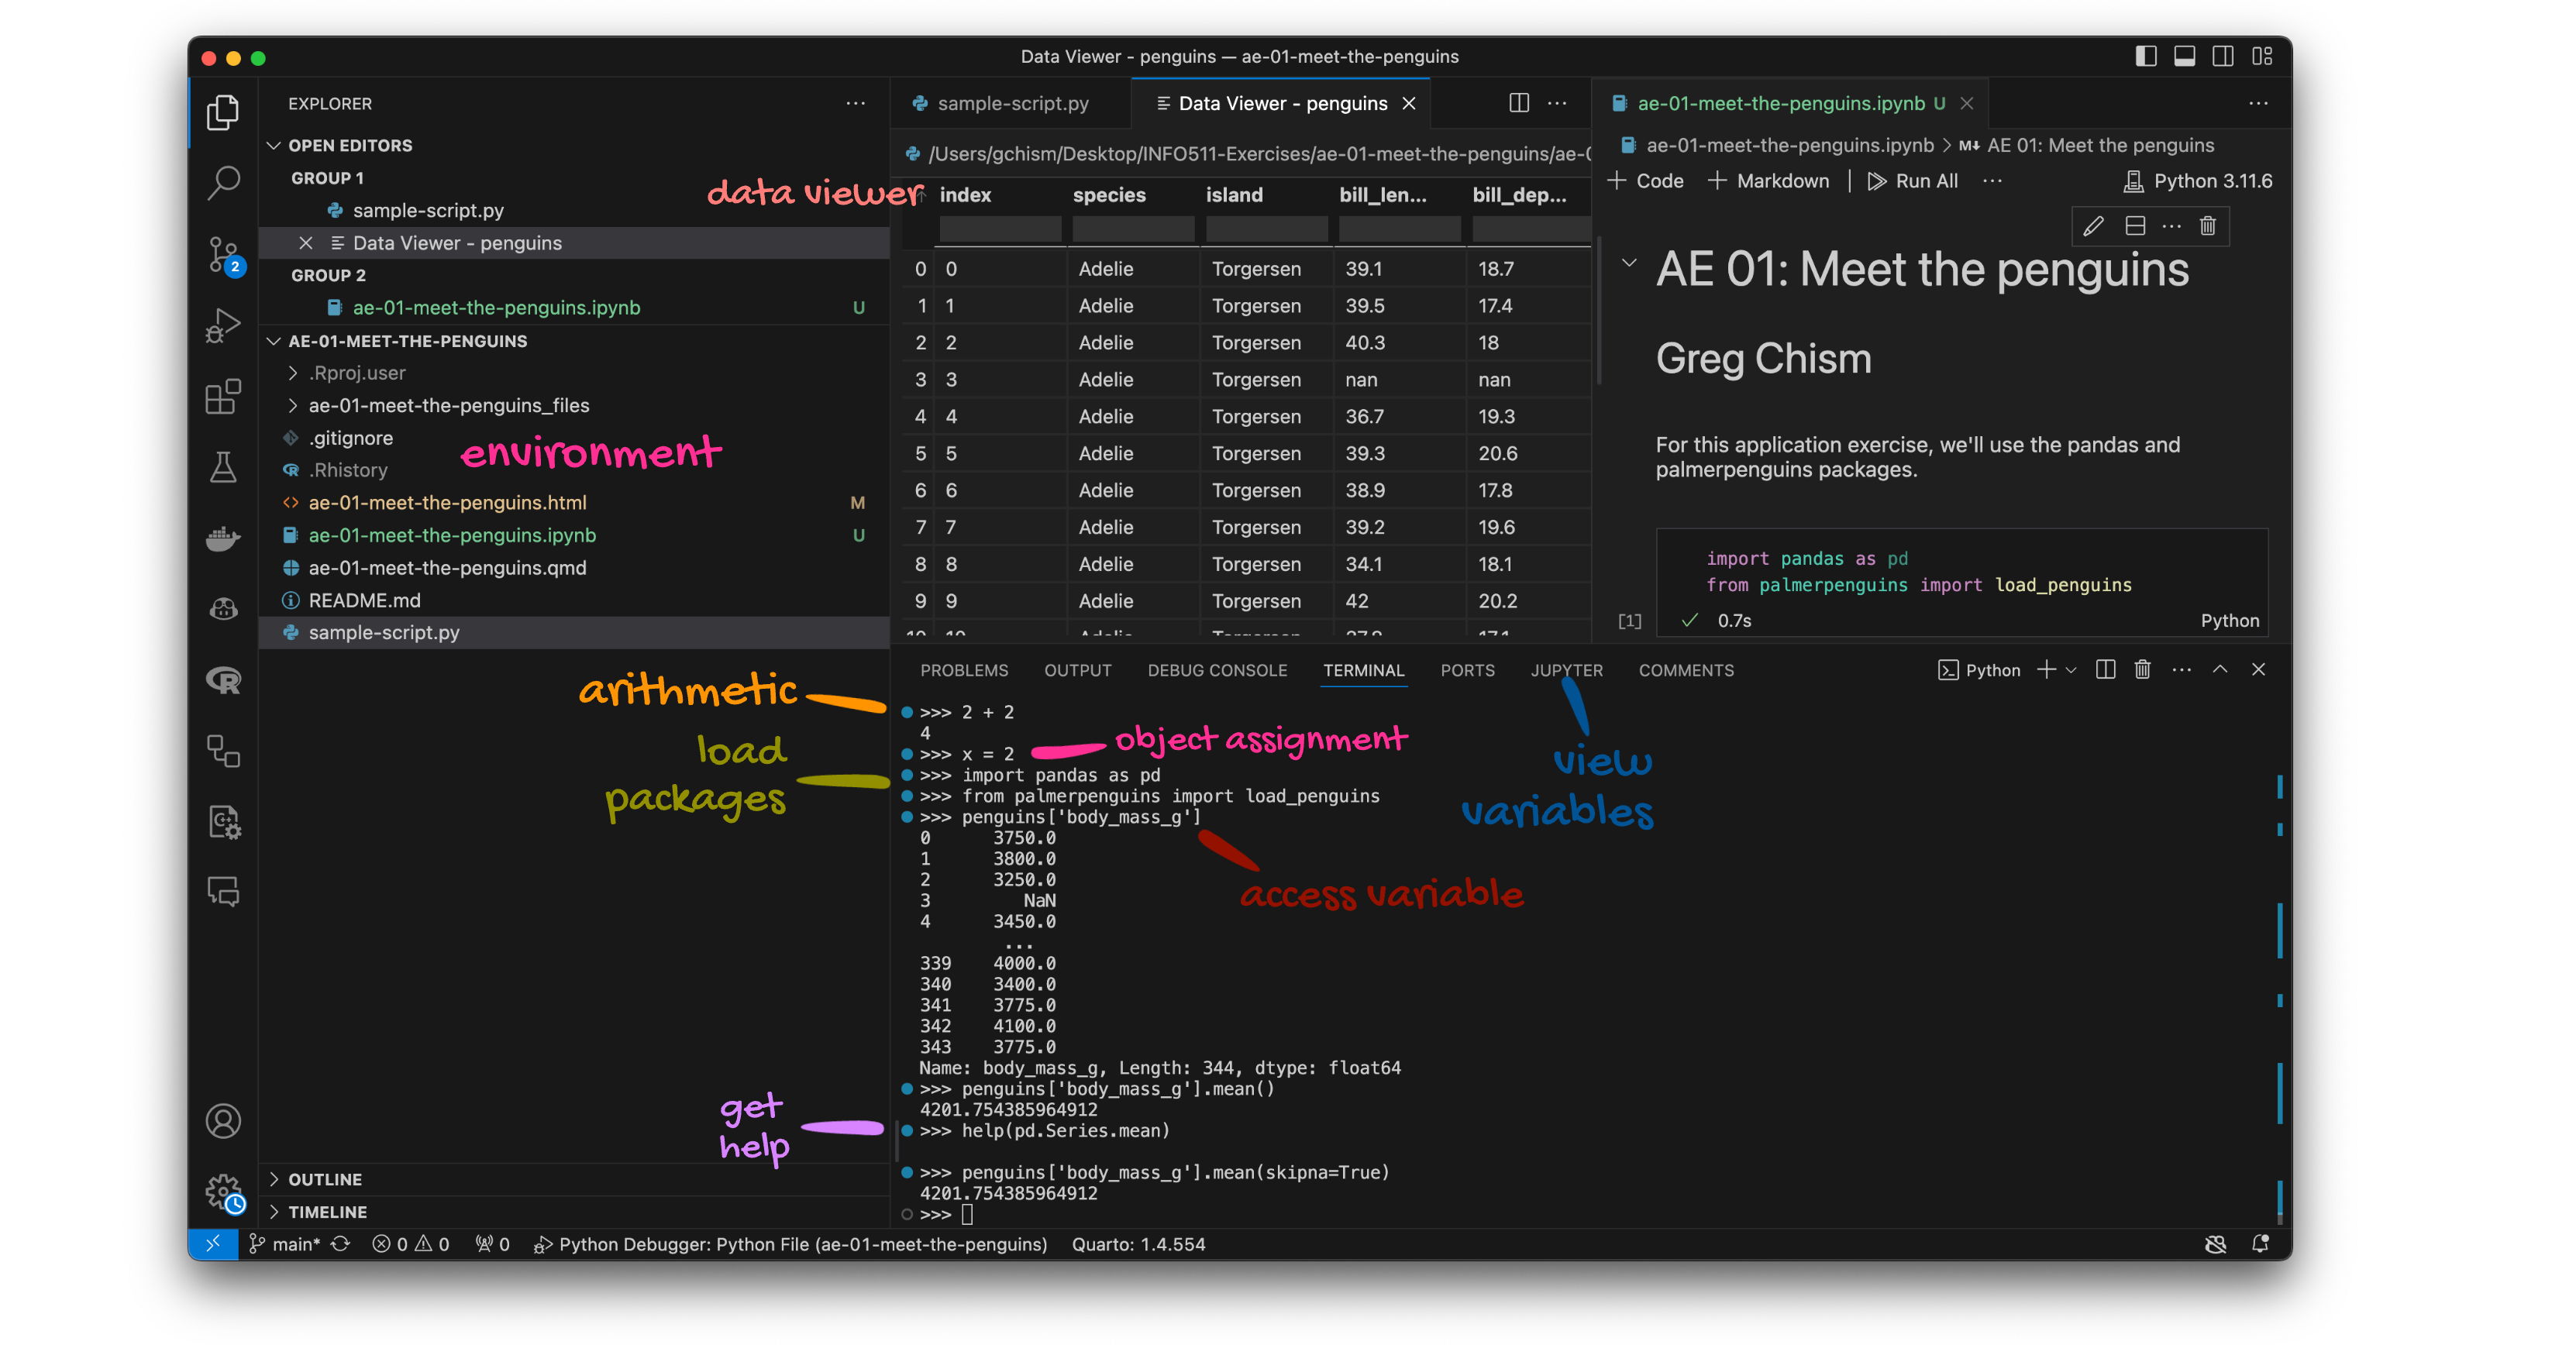
Below are the components of the VS Code IDE.

Committing changes
Now, go to the Git pane in your VS Code window (third icon on the left - above there is a blue (2) next to it).
If you have made changes to your Python script (.py) file, you should see it listed here. Click on it to see the differences. This shows you the difference between the last committed state of the document and its current state including changes. You should see deletions in red and additions in green.
If you’re happy with these changes, we’ll prepare the changes to be pushed to your remote repository. First, write a meaningful commit message (for instance, “update author name”) in the Message box. Finally, click Commit. Note that every commit needs to have a commit message associated with it.
You don’t have to commit after every change, as this would get quite tedious. You should commit states that are meaningful to you for inspection, comparison, or restoration.
In the first few assignments we will tell you exactly when to commit and in some cases, what commit message to use. As the semester progresses we will let you make these decisions.
Now let’s make sure all the changes went to GitHub. Go to your GitHub repo and refresh the page. You should see your commit message next to the updated files. If you see this, all your changes are on GitHub and you’re good to go!
Pushing changes
Now that you have made an update and committed this change, it’s time to push these changes to your repo on GitHub.
In order to push your changes to GitHub, you normally must have staged your commit to be pushed. click on Push. On VS Code however, the staging step has been done for you.
Guidelines
Remember that continuing to develop a sound workflow for reproducible data analysis is important as you complete an assignment and other assignments in this course.
